If you have landed at our page then definitely your iPhone has been stuck in iPhone DFU Mode. No need to worry now as you have landed at perfect destination and your search is finally over. In this article, we have provided detailed information about iPhone DFU Mode, its causes and the working ways to restore lost data. So, what are you thinking for, we strongly suggest you to go through the given article and follow the instructions in given manner. It will definitely help you to resolve all the issues permanently.

What is iPhone DFU Mode?
Iphone is one of the best smartphone which is used by millions of people across the world. It provides best working experience to the users. However, many users has recently complained that their device has been entered in DFU Mode. You should know that DFU stands for Device Firmware Update which is a special state that allows the users to update their firmware. It can also allow the users to restore from a previous backup. But the worst situation arises when your device gets stuck in iPhone DFU Mode. In such a case, you will be unable to boot the device normally and access the saved data. It can hamper the important activities of the users.
How to Recover Data after iPhone DFU Mode?
If your device has been stuck in DFU mode then you will lose your data. To retrieve your data, you can follow the given steps:
Method 1: Recover from iTunes Backup
If you have created backup on iTunes then recovery of the files is quite simple. To restore, follow the given steps:
- Connect your iPhone with the PC by using an USB cable.
- Open iTunes on the PC.
- Once iTunes will detect your device, it will display a message which says that it has detected an iPhone in recovery mode.
- Tap on iPhone’s icon and click on Restore button. It will erase all the data of the device and install the latest version of iOS.
- You can also select Restore from iTunes Backup which will restore the saved files from backup.

Method 2: Recover Data from iCloud
To retrieve your important data from iCloud, you can follow the simple steps which are mentioned below:
- Connect your iPhone with the PC and open iTunes.
- Tap on iPhone’s icon and click on Restore iPhone button.
- Now, click on Restore and Update option.
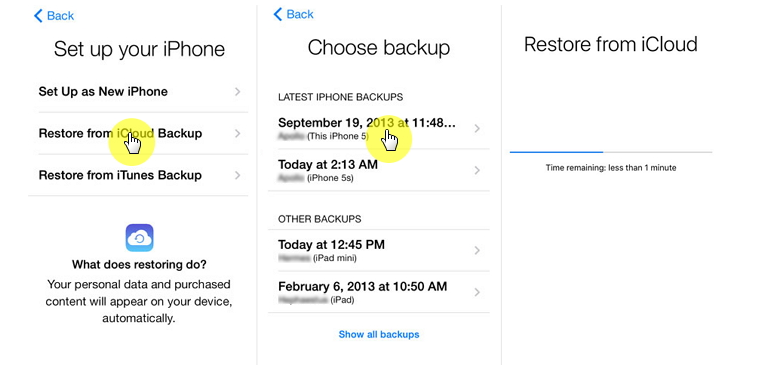
- Once the restoration process gets completed, your device will restart and you will find two options i.e. either set up as a new device or restore from a backup.
- You need to select Restore from iCloud Backup and follow the on-screen instructions to complete the process.
How to Recover Lost Data after iPhone DFU Mode?
If you have lost all the data of your device due to iPhone DFU Mode then we suggest you to make use of iPhone Data Recovery Software. It is one of the advanced tool which is capable to perform deep scanning in the device in order to restore lost, corrupted, formatted or encrypted files. This tool will not change the files quality and restores in original format. It supports user-friendly interface which can be easily handled by the non-technical users. It is compatible with different versions of iOS devices. So, what are you thinking for, download the trial version of the tool as early as possible.
Frequently Asked Questions:
Q: What is iPhone DFU Mode?
A: iPhone DFU Mode is a state which allows the users to update their firmware or restore from backup. In this mode, device will only communicate with iTunes without activatinb the bootloader or iOS.
Q: How to Put your device in DFU Mode?
A: Firstly, you need to turn off the device. Now, press and hold the Power and Home button for 10 seconds. Then release the Power button and hold the Home button until a message appears that iTunes has detected the device in recovery mode.
Q: How to get iPhone out of DFU Mode?
A: You need to press and hold the Power button until Slider to Power Off appears. You need to drag to the right to Power off. Press and hold the Power button again until the logo appears on the screen.
Q: Does DFU Mode erases all the data?
A: No, only entering in DFU mode does not delete any data. But if you will restore or update the firmware then data will be deleted from the device. So, before proceeding you must ensure that you have backed up data properly.
