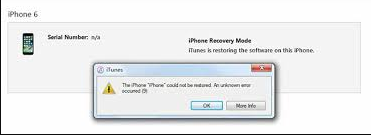
Are you extremely annoyed with iTunes Error 9 in your Android device? Have you detected such error after updating your device via iTunes? Do you want to know the cause of such error on the screen? Have you accidentally lost your important data from iPhone? If your response is positive to all these questions then no need to panic. After reading the given article, you will find detailed information of iTunes Error 9, its causes and effective solution. So, what are you thinking for, we suggest you to go through the given article carefully.

What is iTunes Error 9?
No doubt, iPhone is one of the advanced smartphone which is extremely popular among the users across the world. It comes with a wide range of advanced features to enhance your working experience. In fact, company always releases updates to provide more security and latest features. However, many users has recently complained that they are detecting iTunes Error 9 when they try to update their iPhone by using iTunes. It is extremely an annoying error which can stop the users from performing any normal task on the device. It can also results to data loss issue.
Main Causes Responsible for iTunes Error 9:
There are several factors which are responsible for iTunes Error 9 on the screen. Some of the common causes are mentioned below:
- Using faulty USB cable or port.
- You have accidentally jailbroken your device.
- Corruption of network settings.
- Using security tools in the Apple device,
- Unknown bugs or glitches in the device.
How to Get Rid of iTunes Error 9 Manually?
We are providing some working ways to fix iTunes Error 9 manually. Some of the common methods are mentioned below:
Method 1: Check your USB Cable as well as Port
Many users makes of faulty or broken USB cable to connect their iPhone with the PC. You need to ensure that you are using original USB cable of Apple and it is working properly. You are also advised to do the following checks which are given below:
- Check whether USB cable is not loosely connected.
- Check USB port is not damaged. You can also try to connect with other port.
- Always use certified cable.
Method 2: Update iPhone with iTunes on Another PC
You need to know that iTunes Error 9 is recognized as hardware related problem. So, you are advised to restore your device by using iTunes on different PC.
Method 3: Force Restart your iPhone
Sometimes, users detects iTunes Error 9 on the screen due to unknown bugs or glitches. So, you are advised to restart your device by following the given steps:
For iPhone X, 8 and 8 Plus Users:
- Firstly, press and release the volume up button.
- Now press and release the volume down button.
- Now, press and hold the side button until Apple logo appears.
For iPhone 7 and 7 Plus Users:
- Press and hold side and volume down buttons for 10 seconds.
- Once the Apple logo appears, release them.
Method 4: Check Firewall and Anti-virus on PC
Sometimes, installing the security tools like anti-virus or firewall in the system can also cause error on the screen. These software can stop the iTunes to connect with the Apple server. So, you are advised to check the settings of security software. You can also grant permission iTunes to access the network servers in order to fix the issue.
Method 5: Update iTunes to the Latest Version
Users are advised to update the iTunes to the latest version. It will make the application smarter and help to fix the issue.
For Windows Users:
- Open iTunes in your PC.
- From the menu bar, click on Help and choose Check for Updates.
- If found then download it in the PC.
For Mac Users:
- Launch iTunes in your device.
- From the Menu bar, click on iTunes and select check for updates option.
Method 6: Make Use of Recovery Mode
If you are unable to resolve iTunes Error 9 with the above mentioned steps then you are advised to put your device in recovery mode. But it is quite complex method as you can lose your data from iPhone. So, it is essential to create backup on iTunes or iCloud. After creating backup, follow the given instructions:
- Firstly, update iTunes.
- Now, press and release the volume up button and then volume down button.
- Now, press and hold the side button until iTunes screen appears up.
- Once the device is booted in recovery mode, connect it with the PC by using a USB cable.
- Now, click on Update option to reinstall the operating system.
How to Restore Lost Data after iTunes Error 9?
While fixing the iTunes Error 9, if you have lost your important data then we suggest you to make use of iPhone Data Recovery Software. It is one of the best tool which has been designed by technical experts. It uses high level scanning algorithms to restore the deleted or corrupted files. This tool does not changes the files quality and restores them in original format. It also supports recovery of lost data from various apps in the device. You will get user-friendly interface which can be used by the novice users. So, download the tool without making any delay.