Hello guys! I am really annoyed with Gmail Not Syncing Issue on my Android device. I can’t understand the reason behind it. I have tried to do it manually but ended up with failure. I really don’t know how to deal with the situation now. I am searching for the working ways to get rid of Gmail Not Syncing Issue completely. If you have any idea about it then please help me. All the suggestions are strongly appreciated. I am eagerly waiting for your response. Thanks a lot in advance.
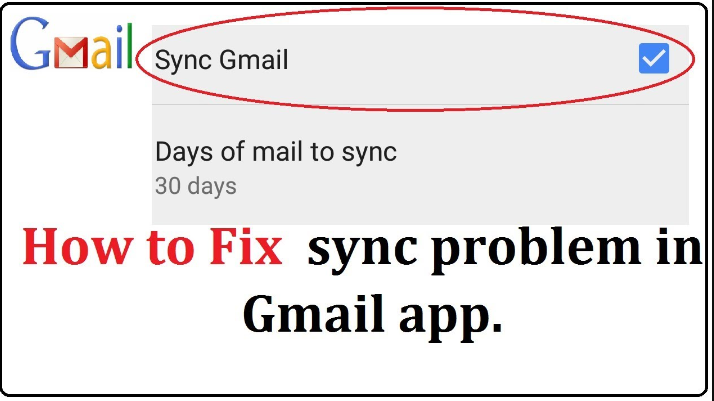
About Gmail Not Syncing Issue:
As you know, Gmail accounts are commonly used for daily communications and performing lots of digital activities. Even more, it also provides huge storage capacity in order to create your backup copy of Android data. However, it is an useful feature but the worst situation occurs when you will detect Gmail Not Syncing Issue. In such a case, the backup of your device data will not be created automatically. It is really an annoying situation for the users which nobody wants to face but it is possible at anytime.
How to Get Rid of Gmail Not Syncing Issue Manually?
There are several methods which can help you to fix Gmail Not Syncing Issue manually. The important points are mentioned below:
Method 1: Check your Internet Connection
For automatic sync, internet connection is extremely important in the device. If you are using a weak or poor internet then you may face such issues regularly. You can troubleshoot the internet issues by following the given steps:
- Try to switch to another Wi-Fi or cellular data.
- Enable the Airplane mode and disable it after few seconds.
- You can make use of a wired internet for faster experience.
- Try to keep your device near to the router.
Method 2: Reboot your Device
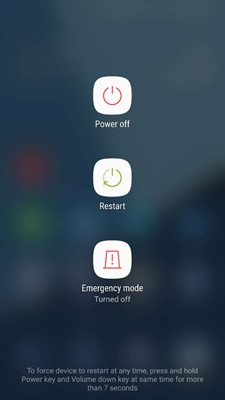
Users are advised to restart their Android device. It will help you to fix the minor bugs or glitches which are causing error. To do so, follow the given steps:
- Press the Power button for few seconds.
- Select Restart from the list.
Method 3: Enable the Auto Sync Option of Gmail
Users are advised to enable the auto sync feature of the Gmail from Android device. To do so, follow the given steps:
- Open the Settings of your device.
- Go to Accounts & Sync.
- Check Auto-sync data feature is enabled or not. If not then toggle on the button.
- Now, click on Google.
- Make sure Gmail is selected.
Method 4: Try to Perform Manual Gmail Sync
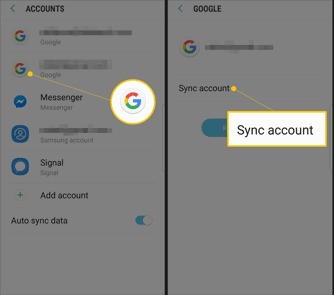
Even after enabling the auto-sync feature, if you are still detecting Gmail Not Syncing Issue then you should try to sync it manually. To do so, follow the given steps:
- Open the Settings of your device.
- Go to Users and Accounts.
- Choose Google from the list.
- Check Gmail Sync is enabled or not.
- Finally, click on Sync now option.
Method 5: Remove and Re-Add your Gmail Account
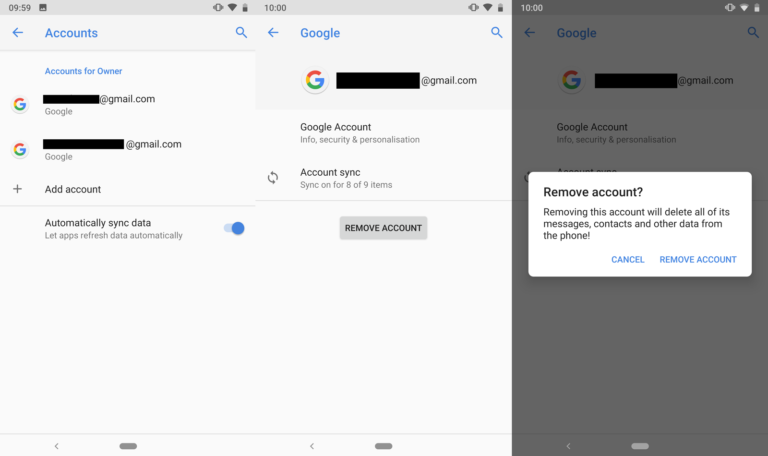
It is also possible that your Gmail account is facing any type of problem in auto-sync. So, you can try to remove the account and re-add it to fix the error. To do so, follow the given steps:
- Open the Settings of your device.
- Under Accounts Section, select your Gmail account.
- Now, click on the three dots.
- Choose Remove Account.
- Reboot your device.
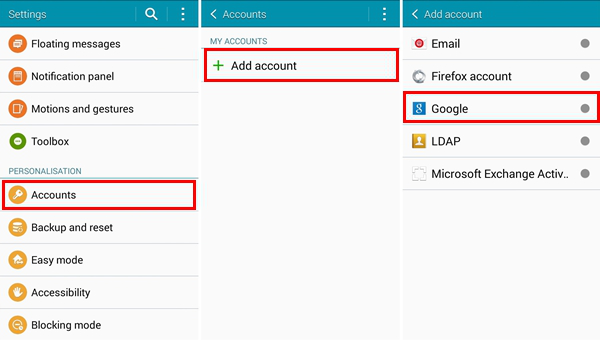
- Again, open Settings >> Account >> Add Account.
- Choose Google and type your login email address and password.
Method 6: Clear the Cache related to Gmail
Some apps doesn’t works properly due to corruption of cache or data. In such a case, you need to clear it by following the given steps:
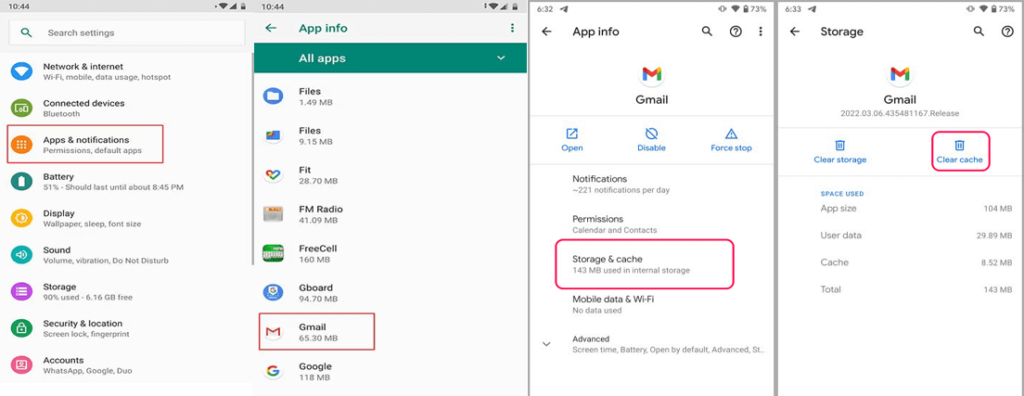
- Open the Settings of your device.
- Click on Apps or Apps Management.
- Choose Gmail and click on Storage Usage.
- Now, tap on Clear Data and Clear Cache option.
How to Regain Lost Data after Gmail Not Syncing Issue?
If you have accidentally lost your important data of the device then you are advised to make use of Android Data Recovery Software. It is one of the advanced tool which is capable to perform complete scanning in the system in order to regain the deleted or corrupted data of Android. In fact, it will not change the files quality or format and restores in their original size. You does not need to have technical knowledge in order to use the tool as it supports user-friendly interface. So, check the working efficiecy of the tool by downloading its trial version now.